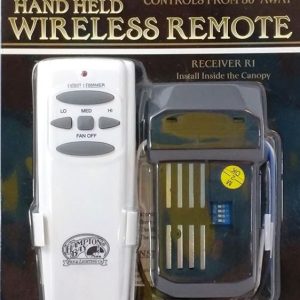
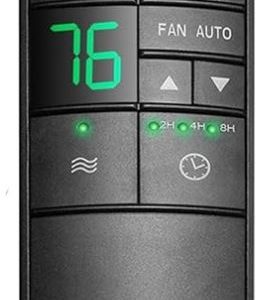
Hampton Bay ceiling fan remotes have been a fixture in North American homes for decades, and the installed base is enormous. Tens of millions of Hampton Bay fans are running in bedrooms, living rooms, and covered patios across the continent, and a significant portion of them are controlled by a remote rather than a pull chain. That’s a lot of remotes, and inevitably, a lot of questions — why did it stop working, how do I get it to pair again, can I replace just the remote without touching the receiver, what does it mean when the fan responds to the wrong buttons. These are reasonable questions, and the answers are more accessible than most people assume once you understand how Hampton Bay’s remote system actually works at a basic level.
The foundation of every Hampton Bay remote system is the relationship between two components: the transmitter, which is the handheld remote you hold in your hand, and the receiver, which is the module wired into the fan’s canopy that accepts commands and controls the motor and light accordingly. These two pieces need to be matched to each other, and the way Hampton Bay accomplishes that matching — across virtually their entire remote lineup — is through a set of physical dip switches. Understanding dip switches is the single most important thing you can know about Hampton Bay remote systems, because nearly every programming, reprogramming, and troubleshooting scenario ultimately comes back to them.
What Dip Switches Are and Why They Matter
Dip switches are a row of tiny toggle switches, each of which can be set to either an up or down position. On Hampton Bay remote systems, there are typically either four or five of them, arranged in a small block. The same dip switch block appears in two places: inside the battery compartment of the handheld remote, and on the body of the receiver module inside the fan canopy. The position of each switch — up or down — creates a unique binary code, and when the transmitter and receiver have matching codes, they communicate. When they don’t match, they don’t. It’s as simple as that.
This system has been in use for so long and across so many Hampton Bay products because it’s inherently reliable. There’s no Bluetooth pairing sequence to complete, no RF channel to scan, no firmware handshake to fail. The code is set mechanically, it doesn’t change unless someone physically moves a switch, and it doesn’t degrade over time. The tradeoff is that programming requires physical access to both components — you can’t do it from your couch — but for a one-time setup, that’s an entirely acceptable limitation. The dip switch approach also means you can run multiple Hampton Bay fans in the same house without interference, simply by setting each receiver to a different switch combination and matching the corresponding remote to it.
How to Program a Hampton Bay Remote — Initial Setup
If you’ve just installed a Hampton Bay remote kit for the first time, or you’re setting up a replacement remote, the programming process starts with physical access to both the receiver and the remote. Cut power to the fan at the breaker — not just the wall switch, the breaker — before you touch anything inside the canopy. Drop the canopy, locate the receiver module (it’s the cylindrical or rectangular unit wired into the canopy, typically white or black with a small antenna wire), and find the dip switch block on it. Note the current position of each switch, either by looking carefully or by photographing it with your phone.
Open the battery compartment on your remote transmitter and find the dip switch block inside. Set every switch on the remote to match the positions on the receiver exactly. If the receiver has switches 1, 3, and 5 in the up position and 2 and 4 down, your remote needs to be set identically. Once they match, install the battery in the remote, restore the canopy, and turn the power back on at the breaker. Within about thirty seconds of restoring power, press any button on the remote. If the fan responds, the pairing is complete. If it doesn’t, double-check that you’ve matched the switches correctly — it’s easy to misread a small dip switch block, especially in the dim interior of a canopy.
One thing worth doing at this stage, particularly if you have multiple remote-controlled fans in the house, is to deliberately set each receiver to a unique dip switch combination and document which combination belongs to which fan. Write it down and keep it somewhere accessible, because when you eventually need to replace a remote, having that reference means you can simply set the new remote to the right combination without opening the canopy at all. It’s a small organizational step that saves a real headache later.
How to Reprogram a Hampton Bay Remote
Reprogramming a Hampton Bay remote is the same process as initial programming — you’re simply changing the dip switch positions to establish a new pairing code. The most common reasons to reprogram are that you’ve replaced a lost or damaged remote and the new one isn’t set to the right combination, that you’re dealing with interference from a neighbor’s remote system and need to change the code, or that you’ve moved a fan from one room to another and want to pair it with a different remote.
Whatever the reason, the process starts the same way. Power off at the breaker, drop the canopy, locate the receiver’s dip switch block, and decide on your new combination. Then open the remote’s battery compartment, set the dip switches to match your chosen combination, and restore power. The new pairing takes effect immediately — there’s no reset procedure, no button sequence, no waiting period. As soon as the receiver and transmitter share the same dip switch code and the receiver has power, they’re paired. Press a button to confirm, and you’re done.
If you’ve acquired a used Hampton Bay remote or a replacement remote and you’re not sure what combination it’s set to, you don’t need to open the fan canopy to find out. Simply open the remote’s battery compartment, read the dip switch positions, then set the receiver to match. It makes no difference which component you treat as the reference — what matters is that they match, not which one you started with.
How to Reset a Hampton Bay Remote Receiver
Resetting the receiver — as distinct from reprogramming it — applies specifically to situations where the fan and remote have lost their communication despite having matching dip switch settings. This happens most often after a power surge, a prolonged outage, or in some cases when the receiver simply loses its synchronization with the transmitter for no obvious reason. The reset procedure doesn’t involve the dip switches at all.
With the dip switches confirmed as matching on both units, try a power cycle reset first. Turn the wall switch off and leave it off for a full sixty seconds, then turn it back on. Within the first thirty seconds after restoring power, press the “Hi” button on the remote and hold it until the fan acknowledges — either by starting, by flickering the light, or by audibly clicking the receiver relay. This re-synchronizes the transmitter and receiver without requiring you to touch the dip switches or open the canopy. It works on the majority of Hampton Bay receivers and should always be the first troubleshooting step when a previously working remote suddenly stops responding.
Some Hampton Bay receivers — particularly newer models and those with thermostatic or timer functions — have a dedicated learn button on the receiver body itself. If yours has one, the reset procedure involves pressing and holding that button for three to five seconds with power applied until an LED on the receiver flashes, then pressing any button on the remote within thirty seconds to complete the pairing. Check your specific receiver’s documentation if you see a small button on the receiver housing, as this procedure varies slightly between models.
Troubleshooting: The Remote Does Nothing
When pressing buttons on the remote produces absolutely no response from the fan, the diagnosis starts with the most obvious possible cause and works outward from there. Check the battery first. Hampton Bay remotes use either a 9-volt battery or AA cells depending on the model, and a weak battery will produce the symptom of complete non-response before it produces any other warning. Replace the battery with a fresh one before doing anything else. This solves the problem more often than experienced troubleshooters like to admit.
If a fresh battery doesn’t help, verify that the wall switch controlling the fan is in the on position. This sounds obvious, but the receiver requires constant power to operate, and if the wall switch is off, the remote has nothing to talk to regardless of how well it’s programmed. Hampton Bay recommends leaving the wall switch permanently on and using the remote for all fan control — turning the fan off via the wall switch cuts power to the receiver and can cause the pairing to drop.
With those basics confirmed, the next step is to verify dip switch alignment. Open the remote battery compartment and photograph the switch positions. Then cut power at the breaker, drop the canopy, photograph the receiver’s switch positions, and compare the two images side by side. A single misaligned switch out of four or five will prevent communication entirely. If you find a mismatch, correct it, restore power, and test again.
If the dip switches match and you still get no response, the receiver itself may have failed. Receiver failure is not uncommon on fans that have experienced power surges or that have been running for many years in humid environments. Receivers are available for replacement on Amazon and through Home Depot, and swapping one out is the same process as the original installation. Before assuming receiver failure, however, verify that the fan itself is functional by temporarily restoring the original pull chain wiring or by testing with a known-good remote and receiver combination.
Troubleshooting: The Fan Responds Intermittently
Intermittent response — where the remote works sometimes but not others, or where you need to press buttons multiple times to get a reaction — points to a different set of causes than complete non-response. The most common is a failing battery that still has enough charge to transmit occasionally but not reliably. Again, replace the battery first. It’s a thirty-second fix and it eliminates the most likely cause immediately.
If a fresh battery doesn’t resolve the intermittent response, the next suspect is RF interference. Hampton Bay’s dip switch remotes operate in the radio frequency range, and other devices in the same frequency band can cause dropped commands. Common interference sources include other ceiling fan remotes set to the same dip switch combination, garage door openers, some wireless doorbells, and certain cordless phone base stations. If you notice the fan responding incorrectly when a neighbor’s remote is in use, or when a specific device in your home is active, changing the dip switch combination to a less common setting usually resolves it. There are either 16 or 32 possible combinations depending on whether your system uses four or five dip switches, and choosing a combination that your neighbors are unlikely to be using — all switches up, or an alternating pattern — typically eliminates cross-talk.
Intermittent response can also result from a loose connection in the canopy. Vibration from the fan motor works wiring connections loose over time, and a receiver that’s losing its power connection intermittently will produce exactly this symptom. With power off at the breaker, open the canopy and check every wire connection — both the wire nuts and the receiver’s own lead connections. Gently tug each wire to confirm it’s seated solidly. Reconnect anything that feels loose, restore power, and test.
Troubleshooting: The Fan Runs But the Light Doesn’t Respond
When the fan motor responds correctly to the remote but the light function doesn’t work — or vice versa — the issue is almost always either a wiring problem at the receiver’s output leads or a failed light kit rather than a remote problem. The receiver has separate output connections for the fan motor circuit and the light circuit, and if the light output lead has worked loose or the light kit itself has failed, the remote will appear not to control the light when in fact it’s sending the correct signal and the receiver is processing it correctly.
With power off, inspect the receiver’s wiring connections. There will typically be separate leads for the fan motor and the light, color-coded according to the wiring diagram included with the kit. Confirm that the light lead is connected to the light kit’s input and not to the motor. Also confirm that the light kit itself is functional by temporarily wiring it directly to a power source if you have the means to do so safely, or by swapping in a known-good light kit to isolate whether the problem is in the remote system or the light kit itself.
On fans where the light is dimmable via the remote, a flickering or unresponsive dimmer function can also result from incompatible bulb types. Hampton Bay’s remote-controlled dimmer circuits are designed for incandescent and certain LED bulbs, and some LED bulbs — particularly older or off-brand ones — don’t respond correctly to the dimmer’s phase-cut control signal. If you’ve recently changed the bulbs in a fan and the dimmer has stopped working properly, try reverting to the original bulb type or switching to bulbs specifically rated for use with ceiling fan remote dimmers.
Troubleshooting: The Fan Runs at the Wrong Speed
A fan that runs on high when you press medium, or that skips speeds, or that runs continuously regardless of what the remote tells it to do, usually indicates a receiver problem rather than a remote problem. The receiver contains the switching circuitry that routes power through different capacitor configurations to produce the three speed settings, and if one of those switching relays has failed or the capacitor associated with a particular speed has degraded, you’ll get incorrect or incomplete speed behavior regardless of what signal the remote is sending.
Before condemning the receiver, however, confirm that the fan’s own motor capacitor is in good shape. The motor capacitor is a separate component from the receiver, typically mounted inside the motor housing rather than the canopy, and a failing motor capacitor produces speed-related symptoms that can look like a remote problem. If the fan runs correctly when wired directly without a receiver in circuit, the motor and its capacitor are fine and the receiver is the problem. If the fan exhibits the same speed irregularity with direct wiring, the motor capacitor is the more likely culprit.
When to Replace the Remote vs. the Receiver
Knowing whether to replace the remote, the receiver, or both saves time and money. The remote transmitter is the right replacement when the physical unit is damaged — cracked housing, corroded battery contacts, stuck buttons — or when it’s been lost. Because the dip switch combination is set mechanically and can be transferred to a new remote by simply matching the switch positions, replacing just the transmitter is straightforward and doesn’t require touching the receiver at all. A replacement Hampton Bay remote transmitter runs between $15 and $30 depending on the model.
The receiver is the right replacement when the fan has stopped responding to a confirmed-working remote with correct dip switch alignment, when the receiver is visibly damaged, or when it has survived a power surge. Receiver replacement requires opening the canopy and performing a basic wiring job, but it’s well within DIY capability. Replacement receivers for Hampton Bay systems are widely available on Amazon and through Home Depot, and a quality replacement runs between $20 and $40. When replacing the receiver, use the opportunity to document the dip switch combination you’ve chosen and store that information somewhere you’ll be able to find it when the next remote eventually needs replacing.
In cases where both components are old and you’re unsure which has failed, replacing both as a matched set is the most efficient approach. A complete Hampton Bay retrofit remote kit — transmitter and receiver together — typically costs between $25 and $50 and eliminates any uncertainty about compatibility between components. Set the dip switches to a fresh combination, install the receiver, pair the transmitter, and you’re starting from a known-good baseline.
Keeping Your Remote System Running Long-Term
The practical longevity of a Hampton Bay remote system depends heavily on a few simple habits. Leave the wall switch in the permanently-on position and use the remote for all control functions — cycling the wall switch on and off repeatedly stresses the receiver and can shorten its lifespan. Change the remote battery annually even if it still seems to be working, because a weak battery is the leading cause of phantom issues and intermittent behavior. Keep a record of your dip switch combination for each fan in the house, stored somewhere you’ll actually be able to find it — a note in your phone, a label inside the fan’s instruction manual, anything that persists. And if you ever notice the fan starting to respond sluggishly or inconsistently, address it promptly rather than waiting for a complete failure — intermittent issues are almost always cheaper and easier to fix than total failures, and the diagnostic process is exactly the same.
Hampton Bay’s remote system is not complicated. It’s a mature, well-documented technology that has been refined over decades, and the parts to support it are abundant and inexpensive. With a basic understanding of how dip switches work and a methodical approach to troubleshooting, the vast majority of remote problems are solvable without a service call, without special tools, and without any expertise beyond the willingness to read a wiring diagram and spend twenty minutes with a screwdriver.