
Installing a ceiling fan can feel intimidating if you’ve never tackled the project before, but the Harbor Breeze Mazon represents one of the more straightforward installations you can attempt as a DIY homeowner. This comprehensive guide walks you through every step of the installation process, from gathering your tools and preparing your workspace through making electrical connections and performing final adjustments. Whether you’re replacing an existing ceiling fan, converting a standard light fixture to a fan installation, or adding a fan to a location that previously had no fixture at all, this guide provides the detailed instructions you need to complete your installation safely and successfully.
Understanding Your Harbor Breeze Mazon Fan Before You Begin
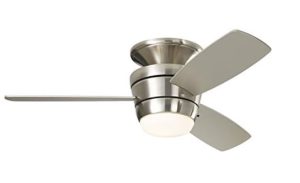
Before diving into the actual installation work, taking time to understand what you’re working with will make the entire process smoother and help you avoid common mistakes that can lead to frustration or safety issues. The Harbor Breeze Mazon is a 44-inch flush mount ceiling fan designed specifically for smaller rooms and spaces with standard or lower ceiling heights. Unlike downrod-mounted fans that hang several inches below the ceiling, the Mazon’s flush mount design positions the fan close to the ceiling surface, making it ideal for rooms with 8-foot ceilings where a hanging fan would feel oppressive or create headroom concerns. The fan comes in several finish options including brushed nickel, oil-rubbed bronze, matte white, and matte black, allowing you to select the option that best complements your room’s existing décor and color scheme.
The Mazon features three reversible blades rather than the five-blade configuration common in many ceiling fans, and this design choice contributes to both the fan’s contemporary aesthetic and its efficient airflow characteristics. The integrated LED light kit provides 18 watts of illumination with a color temperature of 3000K, creating warm white light that’s appropriate for most residential applications. One of the Mazon’s standout features is the included remote control, which allows you to operate both the fan and light without requiring installation of wall switches, making this fan particularly convenient for retrofit installations where running new switch wiring would be difficult or expensive. The three-speed motor provides airflow ranging up to 2,747 CFM (cubic feet per minute) according to official specifications, with the reversible motor function allowing you to change blade rotation direction for seasonal optimization.
Essential Tools and Materials for Installation
Gathering all necessary tools and materials before you begin installation prevents frustrating mid-project interruptions when you discover you’re missing a critical item and need to make an unexpected trip to the hardware store. Start with a sturdy stepladder tall enough to position your head comfortably at ceiling level without requiring you to stand on the top step or reach awkwardly overhead – working at the proper height reduces fatigue and improves safety throughout the installation process. You’ll need both Phillips and flathead screwdrivers, with magnetic tips being particularly helpful for preventing dropped screws. An adjustable wrench or socket set helps with tightening hex nuts and mounting hardware, while wire strippers are essential for preparing electrical connections properly.
A voltage tester or non-contact voltage detector represents one of your most important safety tools, allowing you to verify that electrical power is truly off before you begin working with wiring. Even if you’ve turned off the wall switch, power can still be present in the electrical box, and testing before touching any wires prevents potentially fatal electrical shocks. A drill with appropriate bits may be necessary if you’re installing a new electrical box or fan-rated mounting bracket, though many installations can work with the existing mounting hardware. Needle-nose pliers help with twisting wire connections and manipulating wires in tight spaces, while electrical tape provides additional insulation for wire connections beyond what wire nuts alone provide. Finally, have a pencil and notepad handy for making notes about wire colors and connections as you disassemble any existing fixture.
Critical Safety Precautions and Electrical Code Compliance
Safety must be your absolute first priority when installing any electrical fixture, and ceiling fans present particular challenges because they combine electrical hazards with the mechanical risks of rotating blades and the potential for falls from ladders. The single most important safety step is turning off electrical power at your home’s main circuit breaker panel, not just at the wall switch. Many people make the dangerous mistake of assuming that turning off the wall switch eliminates electrical hazards, but this is absolutely not true – power continues to flow through the wiring to the switch itself, and if you contact these wires while the breaker is still on, you can receive a potentially fatal electrical shock. Locate the circuit breaker that controls power to the room where you’re installing the fan, switch it to the off position, and verify that power is truly off by using your voltage tester to check the wires in the electrical box.
The electrical box that supports your ceiling fan must be specifically rated for fan support with a minimum capacity of 35 pounds, and this represents a non-negotiable safety requirement that you cannot compromise on. Standard electrical boxes designed only for light fixtures are not engineered to handle the dynamic loads, vibration, and rotational forces that ceiling fans generate during operation, and installing a fan on an inadequate box can result in the fan working loose over time and potentially falling from the ceiling. If you’re replacing an existing light fixture with your new fan, you’ll need to verify that the current electrical box is fan-rated – look for markings on the box itself that explicitly state it’s approved for fan support, or assume that it’s not fan-rated and install a proper fan box before proceeding. Fan-rated boxes must be secured directly to solid ceiling framing, either by attaching directly to a ceiling joist or by using a fan-rated brace bar that spans between two joists.
All electrical connections must comply with National Electrical Code (NEC) requirements and any additional local electrical codes that apply in your jurisdiction. While specific code requirements can vary by location, some universal principles include using wire nuts that are appropriately sized for the wire gauges you’re connecting, ensuring all wire connections are made inside the electrical box rather than outside where insulation might be compromised, properly grounding all metal components to prevent electrical shock hazards, and maintaining appropriate wire lengths that allow for easy connections without excessive tension or compression on wires. If you have any uncertainty about code requirements, electrical safety procedures, or your ability to complete the installation safely, hiring a licensed electrician represents a wise investment that ensures code compliance and eliminates potentially life-threatening safety risks.
Removing Your Existing Fixture
If you’re replacing an existing ceiling fan or light fixture with your new Mazon fan, you’ll need to safely remove the old fixture before you can begin installing the new one. Start by ensuring power is off at the circuit breaker and verified with your voltage tester, then remove any glass shades, light bulbs, or decorative elements from the existing fixture to reduce weight and prevent breakage during removal. Most ceiling fans are supported by a mounting bracket attached to the electrical box, with the fan canopy covering this bracket and the electrical connections. Remove the screws or fasteners that secure the canopy to the mounting bracket, then carefully lower the canopy to expose the electrical box and wire connections inside.
Before disconnecting any wires, take a moment to photograph the existing connections or make detailed notes about which wires are connected together – this documentation can be invaluable if you encounter confusion during installation of your new fan. The typical residential electrical configuration includes a black “hot” wire that carries electrical current from the breaker panel, a white “neutral” wire that provides the return path for current, and a green or bare copper “ground” wire that provides safety protection against electrical faults. Some installations may also include a red wire if the original fixture had separately controlled fan and light functions. Disconnect the wire nuts holding these connections together by twisting them counter-clockwise, then carefully separate the wires and straighten them to prepare for new connections.
With the wiring disconnected, you can remove the old fixture completely, along with the mounting bracket if you’ll be installing a new one. Inspect the electrical box carefully to verify it’s securely attached to ceiling framing and shows no signs of damage, cracks, or deterioration. Check that the box is fan-rated by looking for explicit markings or labels indicating fan support capability – if you can’t find these markings, assume the box is not fan-rated and install an appropriate replacement before proceeding with your Mazon installation. Clean any dust, debris, or old insulation from inside the electrical box to provide a clean working environment for making your new electrical connections.
Installing the Mounting Bracket
The mounting bracket included with your Harbor Breeze Mazon ceiling fan provides the structural support that holds the entire fan assembly to your ceiling, so installing this bracket correctly and securely is absolutely critical for safe fan operation. The Mazon’s flush mount design uses a mounting bracket that attaches directly to the electrical box, with the fan motor housing then connecting to this bracket to create a low-profile installation without any visible downrod. Begin by threading the household electrical wires through the center opening in the mounting bracket, leaving sufficient wire length extending beyond the bracket to make connections comfortably – you’ll need at least 6-8 inches of wire extending from the bracket to work with easily.
Position the mounting bracket against the electrical box, aligning the screw holes in the bracket with the threaded mounting holes in the electrical box. Most fan-rated electrical boxes include two mounting screws already installed in threaded holes, and the mounting bracket is designed to slide onto these screws before you tighten them completely. If your electrical box doesn’t have screws pre-installed, use the mounting screws provided with your Mazon fan, ensuring they’re long enough to engage the electrical box threading securely while being short enough that they don’t protrude through the box into the ceiling cavity where they might contact framing or other obstructions. Tighten the mounting bracket screws firmly using your screwdriver, checking that the bracket sits flush against the electrical box surface with no gaps or misalignment.
Verify that the mounting bracket is secure by grasping it firmly and attempting to move it – there should be absolutely no movement, wobbling, or flexing. A loose mounting bracket will cause the fan to vibrate, wobble, or make noise during operation, and in extreme cases can work completely free and drop the fan from the ceiling. If you detect any movement, tighten the mounting screws further, and if the screws won’t tighten any more but the bracket still moves, you may have stripped threads in the electrical box that require repair with thread inserts or replacement of the entire electrical box. Don’t proceed with the installation if you cannot achieve a completely solid, immovable mounting bracket attachment.
Making Electrical Connections
The electrical wiring phase of your Harbor Breeze Mazon installation represents the most critical step from both safety and functionality perspectives, and taking time to make correct, secure connections ensures your fan operates properly while eliminating fire and shock hazards. Before making any connections, ensure power is still off at the circuit breaker and verify this with your voltage tester – it’s worth checking again even if you tested earlier, as mistakes at this stage can be fatal. The Mazon fan includes several wires emerging from the motor housing, typically including a black wire for the fan motor hot connection, a blue wire for the light kit hot connection, a white wire for neutral, and a green or bare copper wire for ground.
The most straightforward wiring configuration involves connecting the Mazon’s black and blue wires together to a single black hot wire from your ceiling electrical supply, the white wire to the white neutral wire, and the ground wire to the ceiling ground wire. This configuration powers both the fan motor and light kit from the same electrical source, allowing the included remote control to manage all functions independently. Strip approximately 1/2 inch of insulation from the end of each wire using your wire strippers, being careful not to nick or cut the copper conductor beneath the insulation. Twist together the black and blue wires from the fan with the black wire from the ceiling electrical supply, ensuring all three conductors are tightly twisted together with no stray wire strands extending beyond the group.
Select an appropriately sized wire nut – typically orange or yellow for this wire gauge and number of conductors – and thread it onto the twisted wire connection by rotating clockwise while pushing firmly. The wire nut should thread onto the wires smoothly, and when fully seated, you should not be able to see any bare copper conductor beneath the wire nut. Tug gently but firmly on each wire to verify the connection is mechanically secure – none of the wires should pull free from the wire nut. Repeat this process for the white neutral connection and the ground connection, ensuring all connections are tight, secure, and properly insulated. For additional safety, wrap electrical tape around the base of each wire nut to provide a secondary layer of insulation and mechanical support.
If your installation includes a remote control receiver module, the wiring becomes slightly more complex as the receiver interposes between the household electrical supply and the fan motor. The receiver module connects to the household wiring first, with separate outputs from the receiver then connecting to the fan motor and light kit. Follow the specific wiring diagram included with your Mazon fan carefully, as receiver wiring configurations can vary between models. The receiver module must be positioned inside the canopy where it won’t interfere with the fan motor or mounting hardware, and the receiver’s antenna wire should be extended and positioned for optimal signal reception rather than being coiled or bundled with other wiring.
Mounting the Fan Motor Assembly
With the mounting bracket securely installed and electrical connections completed, you’re ready to attach the Mazon’s motor assembly to the bracket, a process that requires some physical strength and coordination but follows a straightforward procedure. The Mazon’s flush mount design means the motor housing connects directly to the mounting bracket without any downrod, creating a low-profile installation that positions the fan close to the ceiling. Before lifting the motor assembly, carefully tuck all wire connections and excess wire length up into the electrical box cavity, ensuring wires are arranged neatly without excessive bunching or compression that could damage insulation or create heat buildup.
Lift the motor assembly up to the ceiling, aligning the mounting slots or hooks on the motor housing with the corresponding features on the mounting bracket. The exact attachment method varies slightly between different Mazon production runs, but typically involves either sliding the motor housing onto mounting tabs and then rotating it to lock in place, or aligning keyhole slots with mounting posts and lifting until the slots engage fully. This step can be physically demanding as you’re supporting the full weight of the motor assembly above your head while simultaneously trying to align mounting features you can’t see directly, so having a helper to support the motor while you work the alignment can make this phase much easier.
Once the motor housing engages with the mounting bracket, install the securing screws or fasteners that prevent the motor from rotating or detaching during operation. These securing screws represent a critical safety feature, so don’t skip them or assume the mounting engagement alone is sufficient – the screws prevent the motor from working loose due to vibration and ensure the fan remains safely attached to the ceiling throughout its service life. Tighten these screws firmly with your screwdriver, checking that the motor housing sits flush against the ceiling without gaps or misalignment. The canopy cover, which you’ll install later, conceals these mounting screws and creates the finished appearance.
Attaching the Fan Blades
The blade attachment process for the Harbor Breeze Mazon ceiling fan uses a straightforward screw-based mounting system that secures each of the three blades to blade brackets extending from the motor housing. The Mazon includes three reversible blades, meaning each blade has different finishes on the top and bottom surfaces, allowing you to choose which finish you prefer without requiring different blade sets. Decide which blade finish you want to display (typically the finish that best coordinates with your room’s color scheme), then orient all three blades consistently with that finish facing down toward the floor.
Each blade bracket extending from the motor housing includes pre-drilled screw holes that align with corresponding holes in the blade. Position the first blade against its bracket, aligning the screw holes carefully, then install the mounting screws through the blade and into the bracket threads. The Mazon typically uses three screws per blade, and it’s important to install all screws for each blade rather than using fewer screws to save time – each screw contributes to blade security and helps distribute mounting stresses across the blade structure. Start each screw by threading it a few turns by hand to ensure it’s properly aligned and threading correctly, then tighten firmly with your screwdriver.
As you tighten the blade mounting screws, be careful not to overtighten to the point of stripping the threads or cracking the blade material. The screws should be tight enough that the blade doesn’t move or flex at the mounting point, but you don’t need to apply maximum torque. Repeat the blade installation process for the remaining two blades, ensuring all blades are oriented with the same finish facing down and all mounting screws are tightened to approximately the same torque. After installing all three blades, visually inspect to verify they all appear to be at the same angle relative to the motor housing – blades that are mounted at different angles will cause wobbling during operation and indicate improper installation that needs correction.
Installing the Light Kit
The Mazon includes an integrated LED light kit as part of the fan assembly, and completing the light kit installation provides both functional illumination and the finished aesthetic appearance for your ceiling fan. The light kit typically connects to the motor housing through a combination of electrical connections and mechanical fasteners, and both aspects must be completed correctly for proper light operation and secure attachment. Locate the light kit wiring connections on the underside of the motor housing – these typically include a plug-style connector that mates with a corresponding connector from the light kit assembly, simplifying the electrical connection process compared to traditional wire-to-wire connections.
Connect the light kit’s electrical connector to the motor housing connector, ensuring the connectors fully engage and lock together. These connectors are typically keyed to prevent incorrect connection, but verify you haven’t forced the connection backward or damaged any connector pins during mating. With the electrical connection completed, position the light kit housing against the motor housing, aligning any mounting tabs, slots, or screw holes as indicated in your installation instructions. Install the light kit mounting screws and tighten them securely, ensuring the light kit sits flush against the motor housing without gaps or misalignment.
The Mazon’s integrated LED light module is permanently installed in the light kit and cannot be replaced if it fails, representing one of the fan’s few significant limitations. The frosted glass diffuser that covers the LED module typically attaches through a twist-and-lock mechanism or threaded collar that secures it to the light kit housing. Align any tabs or threads on the glass diffuser with the corresponding features on the light kit, then rotate clockwise until the diffuser locks securely in place. Ensure the glass sits evenly against the light kit housing all the way around its perimeter, indicating proper seating and secure attachment.
Installing the Canopy and Final Assembly
The decorative canopy that covers the mounting bracket and electrical connections represents the final major installation step that creates the Mazon’s finished appearance while concealing all the mounting hardware and wiring you’ve installed. The canopy typically consists of two parts – a canopy ring that attaches to the motor housing and a canopy cover that slides over the ring and mounts to the ceiling. Start by locating the canopy ring and identifying the tabs, slots, or other features that align with corresponding elements on the motor housing.
Position the canopy ring against the motor housing, rotating it as necessary to align the mounting features, then secure it with the provided screws or fasteners. With the canopy ring installed on the motor housing, you can now slide the canopy cover up over the downrod (if your installation uses one) or position it against the ceiling (for flush mount installations like the Mazon). The canopy cover conceals the mounting bracket and all electrical connections, creating a clean, finished appearance. Align any screw holes in the canopy cover with threaded holes in the mounting bracket or canopy ring, then install and tighten the canopy mounting screws.
As you tighten the canopy mounting screws, ensure the canopy sits flush against the ceiling surface all the way around its perimeter. Any gaps between the canopy and ceiling create an unfinished appearance and might indicate the canopy isn’t properly seated on its mounting features. If you notice gaps, loosen the mounting screws slightly, reposition the canopy to eliminate the gaps, then retighten the screws. The canopy should fit snugly against the ceiling without requiring excessive force to position properly – if you’re fighting the canopy or forcing it into position, something isn’t aligned correctly and you should reassess the installation before proceeding.
Remote Control Setup and Pairing
The Mazon includes a handheld remote control that provides convenient operation of both fan speed and lighting functions without requiring installation of wall switches, and properly pairing this remote with the fan’s receiver ensures reliable control. The remote typically arrives with batteries already installed or with batteries included separately that you’ll need to install before use. Open the remote’s battery compartment, verify the batteries are installed with correct polarity as indicated by the markings in the battery compartment, and close the battery door securely.
The pairing process for the Mazon’s remote control system typically involves setting matching codes on both the remote transmitter and the receiver module installed in the fan canopy. These codes are established through DIP switches – small sliding switches that can be positioned either on or off to create a unique code pattern. Locate the DIP switches on both the remote control (typically accessed by removing the battery door or opening a small access panel) and on the receiver module (which you should have accessed during the electrical wiring phase). The receiver’s DIP switches may have been set at the factory, or you may need to set them yourself.
Set the DIP switches on both the remote and receiver to identical positions – it doesn’t matter what specific pattern you choose, as long as the remote and receiver match exactly. If you have multiple ceiling fans with remote controls in nearby rooms, using different DIP switch codes for each fan prevents one remote from controlling multiple fans simultaneously. After setting the DIP switches, close all access panels and battery doors, then test the remote’s operation. Stand within about 20 feet of the fan and press the power button – the fan should respond by turning on or off. Test each fan speed setting and the light control functions to verify all remote functions operate correctly.
Testing, Balancing, and Final Adjustments
With installation completed, thorough testing ensures your Mazon operates correctly and safely before you close up the installation and move on to other projects. Start by restoring electrical power at the circuit breaker, then use the remote control to turn the fan on at low speed. Listen carefully for any unusual noises – clicking, grinding, scraping, or rattling sounds all indicate problems that need correction before regular operation begins. Watch the fan blades as they rotate, checking for any wobbling or irregular motion that suggests balance problems or loose mounting hardware.
If the fan wobbles noticeably during operation, begin troubleshooting by first verifying all blade mounting screws are tight and all blades are securely attached to their brackets. Next, check that the motor housing is firmly attached to the mounting bracket with no movement or play in the connection. If wobbling persists despite tight mounting hardware, you’ll need to use the balancing kit included with your fan to correct blade imbalance. The balancing kit typically includes a plastic clip and several small adhesive weights, and the balancing process involves systematically testing the clip at different positions on each blade to identify which blade is causing the imbalance.
To balance the fan, turn it off and allow the blades to stop completely, then attach the balancing clip to the center of the trailing edge of one blade. Turn the fan on at medium speed and observe whether the wobbling improves, worsens, or stays the same. Repeat this test with the clip positioned on each blade in turn, noting which blade position produces the least wobbling. Once you’ve identified the blade that reduces wobbling most when the clip is attached, move the clip to different positions along that blade’s length to find the optimal position. When you’ve found the clip position that minimizes wobbling, attach one of the adhesive weights at that location on top of the blade, remove the clip, and test the fan’s operation again.
Test the light kit operation by using the remote control to turn the light on and off and to adjust brightness if your remote includes dimming functionality. Verify the light produces even illumination without flickering, dark spots, or unusual sounds from the LED driver circuitry. Test the fan’s reverse function by locating the direction switch on the motor housing and toggling it to the opposite position – the fan should stop briefly, then resume rotation in the opposite direction. During summer months, the fan should rotate counterclockwise when viewed from below to push air downward and create a cooling breeze, while during winter months, clockwise rotation gently pulls cool air upward and redistributes warm air that has accumulated near the ceiling.
Troubleshooting Common Installation Issues
Even with careful installation following all instructions, you may encounter problems that require troubleshooting to resolve. If the fan doesn’t turn on at all when you restore power and test the remote control, start by verifying power is actually reaching the fan by checking the circuit breaker hasn’t tripped and the wall switch (if present) is in the on position. Use your voltage tester to verify power is present at the electrical box connections. If power is present but the fan still doesn’t operate, double-check all wire connections inside the canopy to ensure they’re secure and properly made according to the wiring diagram.
Remote control problems represent one of the most common Mazon installation issues, and these typically stem from battery problems, DIP switch mismatches, or electrical interference. Start troubleshooting remote issues by installing fresh batteries in the remote control, ensuring correct polarity. Verify the DIP switches on both the remote and receiver are set to identical positions – even one switch being different will prevent communication between the remote and receiver. If the remote works intermittently or only when you’re very close to the fan, check that the receiver’s antenna wire is fully extended and positioned for optimal signal reception rather than coiled or bundled with other wiring.
Excessive noise during fan operation can result from several different causes that require different solutions. A humming sound typically indicates electrical issues such as loose wire connections or problems with the motor capacitor, while clicking or ticking sounds usually come from blades contacting the light kit or motor housing due to improper installation or bent blade brackets. Rattling sounds often indicate loose screws somewhere on the fan assembly – systematically check and tighten all screws on the mounting bracket, motor housing, blade attachments, and light kit. Grinding or scraping noises might indicate something is obstructing blade rotation or that the motor has internal problems requiring replacement.
Maintenance and Long-Term Care
Proper maintenance extends your Mazon’s operational life and ensures it continues to operate quietly, efficiently, and safely throughout years of service. Establish a regular cleaning schedule that includes dusting the fan blades at least monthly, or more frequently if you live in a dusty environment or if anyone in your household has allergies or respiratory sensitivities. Use a soft cloth slightly dampened with water or mild cleaning solution to wipe both the top and bottom surfaces of each blade, removing accumulated dust that can contribute to wobbling and reduce airflow efficiency.
Periodically inspect all visible screws and connections on the fan assembly, checking blade mounting screws, canopy fasteners, and light kit attachments for any loosening that might have occurred due to vibration during operation. Tighten any loose screws you discover, but be careful not to overtighten to the point of stripping threads or damaging components. The Mazon’s motor features permanently sealed, self-lubricating bearings that never require oiling, so don’t attempt to add lubricants to the motor – doing so can actually cause damage by introducing incompatible substances or allowing lubricant to contaminate electrical components.
The integrated LED light module in your Mazon is designed to last for many years of normal use, but it will eventually reach end of life and fail. Unfortunately, the LED module cannot be replaced by the homeowner, so when the light fails, you’ll need to either operate the fan without light or replace the entire light kit assembly if Harbor Breeze offers this as a replacement part. Contact Harbor Breeze customer service or check with Lowe’s to determine if replacement light kits are available for your specific Mazon model. Regular operation of your fan – even during seasons when you don’t need active cooling or heating – helps prevent motor bearings from developing flat spots and keeps all mechanical components exercised and functional.
Was this helpful?
Installing your Harbor Breeze Mazon ceiling fan represents an achievable DIY project that most homeowners with basic electrical knowledge and standard tools can complete successfully in a few hours. The key to successful installation lies in careful preparation, strict attention to safety procedures, methodical execution of each installation step, and thorough testing before calling the project complete. Take your time during the electrical wiring phase to ensure all connections are correct and secure, as mistakes in wiring can create fire hazards or prevent the fan from operating correctly. Don’t rush the blade installation and balancing process, as proper blade attachment and balance are critical for quiet, wobble-free operation.
If at any point during the installation process you feel uncertain about procedures, uncomfortable with electrical work, or unable to complete a particular step safely, don’t hesitate to consult with or hire a licensed electrician. The cost of professional installation represents a worthwhile investment compared to the risks of electrical shock, fire hazards, or structural failures that can result from improper installation. With proper installation and regular maintenance, your Mazon ceiling fan should provide years of reliable air circulation, comfortable cooling, and energy-efficient climate control in your home.