
Regency ceiling fans occupy an interesting and somewhat underappreciated corner of ceiling fan history. They were never the dominant brand in the room — that was Hunter, or Casablanca, or later Hampton Bay — but Regency produced fans across several decades that earned a quiet reputation for reliability among the homeowners who had them and the electricians who installed them. A significant number of Regency fans installed in the 1980s and early 1990s are still running today, which is either a testament to how they were built or a reflection of the fact that ceiling fans from that era were constructed with heavier materials and more durable motor components than much of what came after. Probably both. If you’re on this page, you likely have a Regency fan somewhere in your house that you’re trying to identify, repair, or find parts for, and this guide covers what you need to know.
Understanding Regency requires understanding something about how the ceiling fan industry was structured in the 1970s and 1980s. During the ceiling fan boom that followed the energy crisis of the mid-1970s, dozens of brands entered the market in a short period, many of them importing fans from overseas manufacturers and selling them under proprietary brand names through hardware stores, department stores, and catalog retailers. Regency was among this wave, with most of their fans manufactured by or in conjunction with Halsey — a connection that matters practically when you’re trying to source parts, because Halsey and Regency fans of the same era share enough design DNA that components are often interchangeable between the two brands. Knowing this doubles your parts search universe when you’re hunting for a specific component for an older Regency fan.
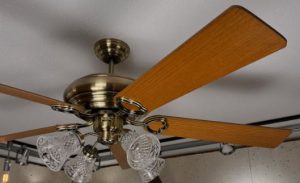
The Regency Fan Lineup — Early Models vs Later Production
The most important distinction in the Regency fan catalog is between the early stack motor models produced roughly through the late 1980s and the later production fans that used the more conventional AC induction motors that became industry standard as the ceiling fan market matured. This distinction matters enormously for repair and maintenance, because the two motor types fail differently, require different diagnostic approaches, and are repaired through different processes.
The early Regency models used stack motors — a motor construction method that was common in American-made fans of that era and that persisted in imported fans from manufacturers who were building to similar specifications. A stack motor is a relatively simple assembly: a stack of laminated steel plates forms the stator core, copper wire windings wrap around the stacked core, and the rotor sits within the stator field. These motors are mechanically straightforward and durable, which is why so many of them are still functional after four decades. The failure modes are also well-understood — the bearings eventually dry out or develop wear, the windings can degrade over time particularly in fans that have been run hot for years, and the flywheel assembly that many of these motors use as part of their starting mechanism can crack or deteriorate.
The flywheel is the component that generates the most repair questions about older Regency fans. In stack motor ceiling fans, the flywheel serves as a mechanical starting assist — it stores rotational energy during startup and helps the motor overcome the inertia of the blade assembly when power is first applied. When the flywheel cracks or develops stress fractures, the fan typically exhibits symptoms that include difficulty starting, starting only in one direction, running sluggishly at certain speeds, or in more severe cases making a mechanical noise during operation that wasn’t present before. A cracked flywheel is a relatively common failure mode in fans of this age and is repairable with the correct replacement component — more on that in the repair section below.
Later Regency production, from roughly the late 1980s onward, used conventional induction motors without flywheel assemblies. These motors are more typical of the general ceiling fan market of their era and have a simpler failure profile. Capacitor failure is the most common issue with these fans, followed by pull chain switch failure and bearing wear. The absence of a flywheel means the diagnostic and repair path is more straightforward — if the motor hums but doesn’t spin, the capacitor is almost always the culprit. If the fan runs on some speeds but not others, the capacitor or pull chain switch are the first things to check. If the motor runs but has developed bearing noise, the bearings are worn and the motor needs either lubrication or replacement depending on the severity.
Regency and Halsey — Understanding the Manufacturing Connection
The relationship between Regency and Halsey is worth understanding in detail because it has direct practical implications for parts sourcing and repair. Both brands were sold through overlapping retail channels during the ceiling fan boom years, and the fans share enough design elements — motor dimensions, blade iron configurations, mounting hardware specifications, and in many cases identical internal components — that Halsey replacement parts will fit Regency fans of the same era and vice versa. This cross-compatibility significantly expands your options when searching for parts for an older Regency fan, because Halsey fans from the same period sometimes appear in parts inventories where Regency-specific parts don’t.
The practical approach when hunting parts for an older Regency fan is to search both brand names simultaneously. If you’re looking for a replacement flywheel, a blade iron set, or a capacitor for a Regency fan from the early 1980s, searching Halsey parts for fans of comparable blade span and motor housing dimensions alongside Regency-specific searches will usually turn up more options. Ceiling fan parts specialists who deal in vintage and discontinued brands are more likely to have cross-referenced this inventory than general retailers, and reaching out directly with the fan’s blade span, motor housing diameter, and any model numbers visible on the motor label will get you the most accurate compatibility confirmation.
The motor housing dimensions are particularly important for identifying compatible replacement components. Regency stack motors from the early production years typically have motor housings in the 3.5 to 4.5 inch diameter range, and the internal dimensions — stator bore, shaft diameter, and bearing seat dimensions — are the specifications that determine whether a replacement part will fit. These dimensions are consistent enough across the Regency and Halsey fans of the same era that sourcing is manageable with some patience, but they’re not interchangeable with the motor dimensions from later production fans or from other brand families of the same period.
Common Regency Ceiling Fan Problems and How to Diagnose Them
If you have an older Regency fan that’s stopped working correctly, the symptoms usually point clearly toward one of a relatively small number of failure modes. Working through them systematically saves time and avoids the expensive mistake of replacing the wrong component. The first and most important step before any diagnosis is confirming that the fan is receiving power — check the breaker, check the wall switch, and use a non-contact voltage tester at the ceiling box wiring to confirm that voltage is present before you pull the fan down for inspection. A surprising number of “broken” fans are fans that aren’t getting power due to a tripped breaker or a failed wall switch.
A fan that hums when power is applied but doesn’t spin is almost always a capacitor failure in later-model non-flywheel Regency fans. The capacitor stores electrical charge and releases it with a phase shift that creates the rotating magnetic field the motor needs to start. When the capacitor degrades below its rated capacitance value — which happens gradually over years of thermal cycling — the motor loses its starting torque. It has enough field strength to hum and hold position but not enough phase shift to generate rotation. The fix is a capacitor replacement. The capacitor is a small cylindrical or oval component with wire leads, located inside the switch housing that hangs below the motor. The replacement capacitor needs to match the original’s capacitance rating in microfarads, which is printed on the label of the original capacitor. Using the wrong capacitance value will damage the motor over time, so matching the rating exactly is important rather than approximating it with whatever is available.
A fan that starts when you spin the blades by hand but won’t self-start is also often a capacitor failure, though in fans with flywheel assemblies it can indicate flywheel deterioration as well. The hand-spin test works because you’re supplying the starting inertia that the capacitor or flywheel normally provides. If the motor runs normally once it’s been started manually but fails to self-start consistently, try the capacitor first since it’s the less expensive repair. If a new capacitor doesn’t resolve the self-starting issue and the fan has a flywheel assembly, inspect the flywheel for cracks.
A fan that runs on some speeds but not others with a pull chain control is typically a pull chain switch failure rather than a motor problem. The pull chain switch routes power through different capacitor configurations to produce the motor’s multiple speed settings, and the internal contacts on these switches wear over time and eventually fail to make reliable contact on one or more speed positions. Replacement pull chain switches for standard ceiling fan applications are inexpensive and widely available, and matching them requires knowing the number of speed positions and the wire configuration — the wiring diagram is usually printed on a label inside the switch housing or can be found in the fan’s original documentation if you have it.
Bearing noise in older Regency fans — a grinding, rubbing, or squealing sound synchronized with motor rotation — indicates dry or worn bearings. Stack motor fans from the early production years used oil-lubricated bearings that required periodic maintenance, and fans that have run for decades without lubrication develop bearing noise as the original oil film degrades and the metal-to-metal contact that results causes wear. Addressing this early, before the wear progresses to the point where the bearing dimensions have changed, involves flushing the old oil from the bearing cavity with a light solvent and repacking with fresh 20-weight non-detergent oil applied through the oil port in the motor housing — the small hole with a cover that’s visible when you lower the canopy. If the bearing noise has progressed to a significant grinding and the fan vibrates during operation, the bearings may be worn beyond what lubrication can correct, and motor replacement is the next step.
Flywheel Inspection and Replacement on Early Regency Models
The flywheel on early Regency stack motor fans is a cast or molded component that attaches to the motor shaft and engages with the blade bracket assembly during startup. On fans where the flywheel is functioning correctly it’s effectively invisible in normal operation — you don’t notice it because it’s doing its job without drawing attention. When it starts to fail the symptoms are usually subtle at first: the fan hesitates before reaching full speed, or it seems to start more slowly than it used to, or you notice an occasional clicking or light mechanical sound during the startup phase that wasn’t present before.
To inspect the flywheel you need to remove the blade assembly and lower the motor housing from the mounting bracket far enough to access the motor’s underside, or in some configurations to remove the motor from the mounting completely. The flywheel is typically visible as a disk or drum-shaped component at the base of the motor shaft. Inspect it carefully for cracks, particularly radial cracks emanating from the center bore or the mounting holes. Even hairline cracks are significant — a cracked flywheel under the stress of motor startup can propagate quickly and cause more serious damage to the motor assembly if it’s not addressed. A flywheel that shows no visible cracks but is producing startup symptoms can sometimes be confirmed as the issue by gently attempting to flex the component by hand — a flywheel that has internal stress fractures not visible on the surface will sometimes show slight movement or flex that a sound flywheel won’t.
Flywheel replacement requires sourcing a compatible replacement component, which is the most challenging part of the repair for older Regency fans. The flywheel dimensions — bore diameter, outer diameter, and the configuration of the blade bracket engagement points — need to match the original. This is where the Halsey cross-compatibility discussed earlier becomes practically useful: flywheel components from Halsey fans of the same era and motor size are often directly compatible with Regency fans, which expands the search considerably. Ceiling fan repair specialists who work with vintage fans are the best resource for sourcing correct replacement flywheels, and providing them with the motor housing diameter, the shaft diameter, and photographs of the existing flywheel gives them enough information to identify compatible replacements from their inventory.
Finding Parts for Regency Ceiling Fans
Parts availability for Regency fans exists on a spectrum that correlates with the age of the fan and the specificity of the component you need. Universal replacement parts — capacitors, pull chain switches, blade irons in standard configurations, and light kit components — are available through general ceiling fan parts suppliers and work across many fan brands including Regency, provided you match the specifications correctly. These are the most commonly needed parts and the easiest to source.
Brand-specific components — flywheels, motor housings, blade sets matched to specific model configurations, and specialized mounting hardware — require more targeted sourcing. Ceiling fan specialty retailers who deal in vintage and discontinued brands maintain inventories of these components and can often cross-reference Regency model information to identify available compatible parts. Online marketplaces occasionally surface new-old-stock Regency components from sellers who acquired inventory from the original distribution chain, and these are worth checking when brand-specific parts are the requirement. Estate sales, antique stores, and used appliance dealers in regions where ceiling fan installation was common in the 1980s sometimes yield complete donor fans that can be cannibalized for specific components — a practical option when a single part is needed and a complete replacement fan isn’t warranted.
The model number on your Regency fan is the starting point for any parts search, and it’s located on a label affixed to the motor housing — typically accessible by lowering the canopy. Older Regency fans sometimes have labels that have faded or partially delaminated over decades of heat cycling near the motor, so photograph what’s there before you attempt to clean the area. Even a partial model number provides useful information for a parts specialist. If the label is completely illegible, the blade span measured from blade tip to blade tip across the motor center, the motor housing diameter, and the number of blades are the secondary identifiers that can narrow down the model sufficiently for parts compatibility purposes.
Cleaning and Maintaining an Older Regency Fan
Regular maintenance is what separates Regency fans that run for fifty years from ones that fail at thirty, and the maintenance requirements for these older fans are somewhat different from modern sealed-bearing fans that require essentially no attention between installations. Stack motor fans with oil-lubricated bearings need periodic oiling — every few years for a fan in regular use, more frequently for fans running in hot or dusty environments. The oil port is a small opening in the motor housing, usually covered by a removable plug or cap, and it provides access to the bearing cavity. Use 20-weight non-detergent machine oil, applied in small amounts — a few drops rather than a generous pour. Overfilling the oil cavity can cause oil to migrate into the motor windings, which creates its own problems.
Dust accumulation inside the motor housing is the other maintenance issue that older fans develop over time. The ventilation openings in the motor housing allow dust to enter and accumulate on the windings and internal components over years of operation, and heavy dust accumulation insulates the motor thermally and contributes to overheating. An annual cleaning with compressed air directed through the ventilation openings removes accumulated dust before it reaches the point of causing thermal problems. Turn the power off at the breaker before cleaning — not just at the wall switch — and direct the compressed air from outside in through the vent openings to push accumulated dust outward.
Blade cleaning matters for performance as well as appearance. Blades accumulate dust on their upper surfaces over time, and uneven dust loading across the five blades creates minor imbalances that show up as increased vibration at higher speeds. Wiping the top and bottom surfaces of each blade with a damp cloth during routine cleaning keeps the blade plane balanced and prevents the gradual wobble development that dusty blades produce. While you have the blades wiped down, check the blade iron screws for tightness — blade iron screws work themselves slightly loose over years of vibration, and a loose screw at the blade iron mounting point is one of the most common causes of clicking and wobble in fans that were previously running smoothly.
Regency Fans — Are They Worth Repairing or Replacing
This is the practical question that most people with an aging Regency fan eventually face, and the honest answer depends on the specific fan, the nature of the failure, and what you’d be replacing it with. The economic argument for repairing an older Regency rather than replacing it is stronger than it sounds at first. A capacitor replacement costs under twenty dollars in parts and an hour of labor for a reasonably capable DIYer. A pull chain switch replacement is similar. Even a flywheel replacement, which is the most involved repair on the early stack motor models, is typically under fifty dollars in parts plus the labor to access and replace the component — significantly less than the cost of a quality replacement fan plus installation.
The performance argument for keeping a functional early Regency running is also more credible than the age of the fan might suggest. The stack motors in early Regency fans are heavy and well-constructed by the standards of their era, and a properly maintained one running on fresh bearings and a new capacitor often moves air more effectively than a modern budget fan at the same blade span. The blade pitch on older fans was frequently more aggressive than modern budget fan blades, which produces more airflow per revolution at the cost of slightly more motor load — a trade-off that favors airflow performance in the sizes and room types where these older fans were installed.
The case for replacement rather than repair makes more sense when the motor itself has failed beyond what a component repair can address — worn bearings that have reached the point of shaft play, winding failures, or structural damage to the motor housing. It also makes sense when the fan’s aesthetic has genuinely stopped working in the space and a visual update is warranted regardless of functional status. In those situations, the repair investment doesn’t return value proportional to its cost, and a new fan at the appropriate quality tier for the space is the better decision. For everything short of that threshold, a Regency fan that was built well and has been reasonably maintained is worth keeping running.