
Programming a ceiling fan remote control transforms how you interact with your fan, replacing inconvenient pull chains with wireless convenience that lets you adjust speed and lighting from anywhere in the room. Modern ceiling fan remotes use radio frequency (RF) technology to communicate with a receiver module installed inside the fan’s canopy or switch housing, allowing you to control fan speed, direction, light intensity, and in some cases, timers and scheduling functions. However, the programming process varies significantly between manufacturers and even between different models from the same brand, leading to confusion when generic instructions don’t match your specific remote. Failed programming attempts—where the remote won’t sync with the receiver, controls only work intermittently, or multiple fans respond to the same remote—frustrate homeowners and sometimes result in unnecessary service calls or product returns when the real problem is simply incorrect programming procedure. This comprehensive guide explains how ceiling fan remote systems work, walks through the programming process for major brands and universal remotes, troubleshoots common sync problems, and provides tips for optimizing remote performance and reliability in your home.
Ceiling fan remote control systems consist of two primary components that must communicate properly for the system to function: the handheld transmitter (the remote) and the receiver module installed in or near the fan. The transmitter contains a small circuit board with buttons, an RF transmitter chip operating in the 315-434 MHz frequency range (depending on manufacturer), and a battery (typically one or two AAA batteries, or a CR2032 coin cell). When you press a button, the transmitter broadcasts a coded RF signal containing the command (fan speed, light on/off, etc.) and a unique identification code that prevents your remote from controlling your neighbor’s fan. The receiver module—a rectangular box usually measuring 2×3 inches—mounts inside the fan’s canopy or switch housing and connects inline between the house wiring and the fan’s motor and light kit. The receiver monitors for RF signals matching its programmed identification code, then switches the appropriate circuits to execute commands. Most modern receivers can memorize multiple remotes (typically 3-6 remotes per receiver), allowing different family members to each have their own remote controlling the same fan, or letting you control multiple fans with a single remote depending on how you program the system.
Basic programming procedures
The basic programming procedure—common across most ceiling fan remote brands—involves putting the receiver into “learning mode” where it’s ready to accept a new remote’s identification code, then transmitting that code by pressing specific buttons on the remote in a precise sequence. Here’s the general process that applies to most systems: First, ensure the fan’s circuit breaker is ON, supplying power to the receiver. Locate the programming button on the receiver module (often labeled “PROG,” “LEARN,” “SET,” or marked with a small indented button). This button may be on the receiver’s circuit board accessible by removing the receiver cover, or it might be accessible through a small hole requiring a paperclip to press. Press and hold the receiver’s programming button for 3-8 seconds (timing varies by brand) until you see an indicator—the fan light may flash, you might hear a beep from the receiver, or an LED on the receiver board illuminates. This indicates the receiver has entered learning mode and is waiting to receive the remote’s code. Within 30-60 seconds (before learning mode times out), press the designated button or button combination on the remote—some brands require pressing only the light button, others need you to hold the fan speed button and light button simultaneously, while some have a dedicated “SYNC” or “PAIR” button. The fan should respond—typically the light flashes or turns on briefly—confirming successful programming. If nothing happens, the pairing failed and you need to repeat the process, paying close attention to timing and button sequences specific to your brand.
Brand-specific remote programming
Brand-specific programming procedures deviate from the general process in important ways, so identifying your fan’s manufacturer and consulting their specific instructions prevents frustration. Hampton Bay remotes (sold exclusively through Home Depot) use DIP switches—tiny toggle switches inside both the remote and receiver that must be set to matching positions. Open the remote battery compartment and locate 4-8 small DIP switches, then open the receiver housing and find the corresponding switches. Set all switches to the same positions (all up, all down, or any combination as long as they match). This creates the unique code that pairs the remote and receiver without requiring a programming button sequence. Hunter fan remotes typically don’t require manual programming at all—they come pre-paired from the factory with matching codes already established. If you need to pair a replacement Hunter remote or add an additional remote, turn off power at the breaker for 30 seconds, turn power back on, then within 60 seconds press and hold any button on the new remote until the fan responds. For more specific guidance, if you own a Harbor Breeze fan (another Home Depot exclusive brand), check out this detailed guide on how to program a Harbor Breeze ceiling fan remote, which covers the specific DIP switch configurations and pairing sequences for various Harbor Breeze models.
Universal fan remotes
Universal ceiling fan remotes promise compatibility with multiple fan brands using programmable codes and learning functions, but achieving successful pairing requires understanding which type of universal remote you’re using. The most common type uses brand-specific code entry: you reference a code list included with the remote manual, find the 3-4 digit code corresponding to your fan’s manufacturer, then program that code into the remote by pressing buttons in a specific sequence (usually holding the SETUP button until an LED lights, then entering the numeric code using number buttons). If the first code doesn’t work, try alternate codes listed for your brand—manufacturers often use different receiver models across their product lines requiring different codes. A second universal remote type uses “learning mode” where the remote learns commands from your original remote: you point both remotes at each other, press a button on the universal remote to enter learning mode, then press the corresponding button on the original remote to transmit the command. The universal remote captures and stores that command, repeating for each button you want to program. A third type—RF code learning remotes—attempts to detect and clone the RF signal from your original remote automatically without button-by-button programming. Success rates with universal remotes vary dramatically depending on how closely the universal remote’s protocols match your specific fan receiver, so keep your expectations moderate and retain your original remote as backup.
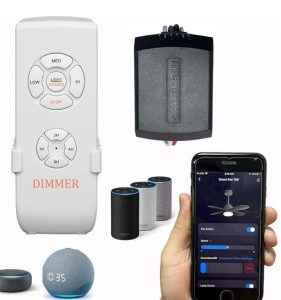
Troubleshooting remote programming failures requires systematic diagnosis of the most common problem sources. If pressing buttons during programming produces no response from the fan, first verify the obvious: check that the remote has a fresh battery installed correctly with proper polarity (+ and – aligned correctly), confirm the circuit breaker is ON and the fan has power, and verify you’re pressing the correct buttons in the right sequence per your instruction manual. If those basics check out, the receiver may not be entering learning mode—try holding the programming button longer (some receivers require 10-15 seconds rather than 3-5), or the button might be stuck or damaged requiring paperclip pressing if it’s a recessed button. If the fan responds inconsistently—sometimes working, sometimes not—you’re experiencing RF interference or weak signal strength. Metal ceiling boxes, foil-backed insulation in the ceiling cavity, or proximity to other RF devices (baby monitors, cordless phones, WiFi routers, smart home hubs) can degrade RF signals. Try programming the remote while standing very close to the fan, and test whether moving closer improves control reliability. If you can only control the fan from certain positions in the room, you have a signal strength issue—solutions include repositioning the receiver’s antenna wire (often a simple piece of wire hanging from the receiver) for better transmission, or installing an RF signal repeater if your home’s construction severely blocks signals.
Multiple fans responding to the same remote
Multiple fans responding to the same remote indicates programming overlap where different receivers have learned the same identification code. This commonly occurs in apartments, condos, or houses with multiple ceiling fans when each fan’s receiver was programmed with default settings or when homeowners accidentally program multiple receivers with the same remote. Solving this requires reprogramming each fan with a unique code or frequency setting. For remotes using DIP switches, change the DIP switch positions on one fan’s receiver and its corresponding remote to create a unique code different from your other fans. For remotes with frequency settings, check for a frequency selection switch on the receiver (often labeled FREQ with options like 1/2/3 or A/B/C)—set each fan to a different frequency position. After changing receiver settings, reprogram the remote following the brand’s pairing procedure to sync it with the modified receiver. Some advanced remotes offer multi-fan control as a feature rather than a bug—they include dedicated buttons labeled “FAN 1,” “FAN 2,” “FAN 3” that let you intentionally control multiple fans from a single remote by programming different receivers to respond to different button sets.
Remote control range problems—where you must be very close to the fan for commands to work—frustrate users who expected whole-room control like TV remotes provide. Ceiling fan remotes typically achieve 30-50 foot range in open areas, but walls, floors, and especially metallic barriers reduce this significantly. If you’re experiencing shorter range than expected, first replace the remote battery even if it seems to work—weak batteries reduce transmit power and range degrades before the remote stops working entirely. Check that the receiver’s antenna wire (if equipped) extends outside the metal canopy rather than being coiled up inside where the canopy shields the signal. Some receivers have antenna wires that should hang down visibly below the canopy for optimal signal reception, though this looks unsightly. Consider installing an external antenna extension if your receiver supports it—these wired extensions move the antenna away from the fan housing to a location with better RF propagation. For severe range issues in large homes or homes with metal lath plaster walls, RF signal repeaters can be installed to boost remote signals, though these add cost ($40-$80) and complexity.
Battery life in ceiling fan remotes – is it good or bad?
Battery life in ceiling fan remotes varies from 6 months to 2+ years depending on remote type, battery quality, and usage frequency. Remotes using AAA batteries typically last 12-18 months with moderate daily use, while coin cell (CR2032) remotes may need replacement every 6-9 months since coin cells have lower capacity. Upgrade to lithium batteries rather than standard alkaline for longer life and better cold-weather performance if your fan is in an unheated space. When battery voltage drops too low, you’ll notice symptoms before complete failure: increased delays between pressing buttons and fan response, commands only working when very close to the fan, or needing to press buttons multiple times for response. Replace batteries at the first sign of degraded performance rather than waiting for complete failure—low battery voltage can cause erratic behavior where the remote sends corrupted codes that confuse the receiver, sometimes requiring complete reprogramming to restore normal function. Keep spare batteries in your home’s emergency supply kit since ceiling fan remote batteries always seem to die at inconvenient times like during heatwaves when you need the fan most.
Remote control interference from other devices operating in the same RF frequency bands causes mysterious control problems that come and go seemingly randomly. Ceiling fan remotes operate in the 315 MHz or 433 MHz ISM (Industrial, Scientific, Medical) bands that are unlicensed and shared with garage door openers, wireless doorbells, car key fobs, weather station sensors, and various smart home devices. If your remote suddenly stops working or becomes unreliable without any changes to the fan or remote, nearby RF interference is likely culprit. Identify potential interference sources: a new wireless doorbell installed near the fan, a neighbor’s new garage door opener, a recently installed smart home hub, or even passing vehicles with remote start systems. Test for interference by turning off suspected devices one at a time and checking whether remote control reliability improves. Some high-end ceiling fan remotes offer frequency hopping or encryption features that resist interference better than basic models—if interference is chronic in your location, upgrading to a higher-quality remote system may provide better reliability. Alternatively, consider switching to a smart fan controller using WiFi or Z-Wave protocols that operate in different frequency bands (2.4 GHz or 900 MHz) with more sophisticated interference avoidance.
Smart ceiling fan controls
Smart ceiling fan controls represent the evolution beyond traditional RF remotes, offering smartphone apps, voice control through Alexa or Google Assistant, scheduling, integration with home automation systems, and remote control from anywhere with internet access. These smart controllers replace traditional RF receivers with WiFi-connected modules or integrate with existing smart home platforms through bridge devices. Programming smart fan controls differs significantly from traditional remotes—instead of button sequences and DIP switches, you install a mobile app, create an account, put the controller in pairing mode, then use the app to discover and add the device to your network. The app then becomes your primary control interface, though many smart fan controllers also include physical remotes for users who prefer traditional control methods. The programming process requires your WiFi network name and password, and some controllers only work with 2.4 GHz WiFi networks (not 5 GHz), which catches many users off-guard since modern routers often use dual-band networks. If you’re considering upgrading to smart controls, verify compatibility between your ceiling fan model and the smart controller—some fans require specific wiring configurations or have physical space limitations in the canopy that prevent installing certain smart controllers.
Maintaining remote control systems over years of use requires occasional reprogramming and troubleshooting as components age and environmental conditions change. Power outages sometimes erase receiver programming, requiring you to re-pair remotes after power restoration—if this happens frequently, your receiver may have a faulty memory chip requiring replacement. Electrical noise from nearby appliances, LED bulbs, or power supplies can interfere with receiver operation causing missed commands or erratic behavior—swapping to higher-quality LED bulbs or adding power line filters may solve these issues. Remote buttons wear out with heavy use, becoming less responsive or requiring hard presses to register—cleaning the contact surfaces inside the remote with isopropyl alcohol sometimes restores function, but eventually worn remotes need replacement. Receivers fail less frequently than remotes but do eventually wear out, typically manifesting as completely unresponsive behavior even after reprogramming attempts, or intermittent operation that worsens over time. Most ceiling fan manufacturers sell replacement receiver modules ($20-$45) that install relatively easily if you’re comfortable with basic electrical work, or you can hire an electrician for installation ($80-$150 including parts and labor). Keep your original remote packaging and instruction manual in a safe place—model numbers and programming instructions printed on these materials become invaluable years later when you need to order replacements or troubleshoot forgotten procedures.