
Installing a ceiling fan downrod isn’t rocket science, but it does require some patience and attention to detail. Whether you’re swapping out an existing downrod for a longer one to improve airflow or installing a new fan from scratch, the process is pretty straightforward once you understand the basics. Most homeowners can handle this project in under an hour with just a few common tools—typically just a screwdriver, adjustable wrench, wire strippers, and a voltage tester. That said, working with electrical components and balancing on a ladder means you need to take this seriously and follow proper safety protocols.
Before you start, make sure you’ve got the right downrod length for your space. The general rule is that your fan blades should hang 8-10 inches below the ceiling for optimal air circulation, with at least 7 feet of clearance from the floor. Rooms with higher ceilings benefit significantly from longer downrods because they bring the fan closer to the living space where you actually need the airflow. If you’re working with a Kichler fan, you’ll want to grab a genuine Kichler ceiling fan downrod that matches your model’s specifications. Using the manufacturer’s parts ensures proper threading and secure mounting, which is obviously critical when you’re hanging something that spins above your head. Cheap aftermarket parts might save you a few bucks, but they’re not worth the risk if the threading doesn’t match perfectly.
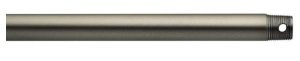
Start by turning off the power at your circuit breaker—not just the wall switch. I can’t stress this enough because wall switches can fail or someone might accidentally flip them back on while you’re working. Use a non-contact voltage tester to double-check that the wires are dead before you touch anything. These testers are cheap insurance and take all the guesswork out of whether the power’s really off. Once you’ve confirmed the power’s off, remove the canopy (the decorative cover against the ceiling) by loosening the set screws or twist-lock mechanism. Carefully lower the fan’s mounting bracket to access the downrod connection at the top. You’ll typically find a clevis pin, cotter pin, or similar fastener holding the downrod to the mounting ball.
Next, disconnect the fan’s wiring by unscrewing the wire nuts that connect the black (hot), white (neutral), and green or bare copper (ground) wires. Take a photo with your phone before you disconnect anything—it’s a simple step that’ll save you confusion later if you forget which wire went where. Let the fan rest on a stable surface like a padded stepladder or have a helper hold it while you work on the downrod. Some people try to do this solo and end up dropping the fan or straining their back, so don’t be a hero if you’ve got someone who can lend a hand for five minutes.
Remove the old downrod by locating the set screws on the mounting ball—there are usually two or three small screws that secure the downrod in place. Loosen these with an Allen wrench or screwdriver (depending on your fan model) and carefully slide the downrod out of the mounting ball. Some fans have the wiring running through the downrod itself, so you may need to carefully thread the wires back through as you remove it. This is where patience really pays off because yanking on the wires can damage the connections inside the motor housing. If the wires seem stuck, rotate the downrod slowly while pulling gently to help them work their way through.
Threading the wires through your new downrod is usually the trickiest part of the whole operation. Feed the wires from the fan motor up through the downrod before attaching it to the mounting ball. A little electrical tape wrapped around the wire ends can make them easier to push through without snagging on the inside of the tube. Some people use a piece of string or wire fish tape to pull the wires through on longer downrods, which honestly makes life a lot easier. Once the wires are through, slide the downrod onto the mounting ball and align the set screw holes. Secure the downrod to the mounting ball with the set screws, making sure everything’s tight and aligned properly—if the downrod isn’t perfectly straight, your fan will wobble no matter how well you balance it later.
Now comes the physically demanding part of hoisting the fan back up to the ceiling. This is definitely easier with two people, especially if you’re working with a larger fan or longer downrod. Thread the wires through the ceiling mounting bracket and carefully reconnect them to the corresponding house wires—black to black, white to white, and ground to ground. If your fan has a light kit, you might also have a blue wire for the light, which typically connects to the black wire or to a separate switch wire if you’ve got a dual switch setup. Twist the bare wire ends together clockwise, then secure them with wire nuts by pushing them on firmly and giving them a tug to make sure they’re solid. Tuck the wire connections neatly into the electrical box without forcing them—you don’t want any pinched wires that could short out later.
Carefully push the mounting bracket back into place against the ceiling, making sure the downrod sits properly in the bracket’s mounting cradle. The canopy should slide up the downrod and lock against the ceiling, hiding all your electrical work and giving everything a clean, finished look. Most canopies have set screws or a twist-lock collar that secures them in place—don’t overtighten these or you might crack the canopy, but make sure they’re snug enough that nothing rattles when the fan’s running.
Give the downrod connection a firm tug and gently try to wiggle the fan to make sure everything’s secure before you restore power. This is your last chance to catch any installation errors before you energize everything. Once you’re confident the installation is solid, head back to the breaker box and flip the power back on. Test the fan at different speeds and watch for any wobbling or unusual noises that might indicate the downrod wasn’t seated correctly in the mounting ball. A little wobble is normal, especially at higher speeds, but excessive movement means you need to cut the power again and check your connections.
If your fan seems unbalanced after installation, the downrod likely isn’t the culprit—it’s usually blade issues or a mounting bracket that’s slightly off-kilter. Check that all the blade screws are tight and that each blade is the same distance from the ceiling when you measure from the tip to the ceiling. Most ceiling fan manufacturers include a balancing kit with small weights you can clip to the blades to fine-tune performance. Start by running the fan and noting which direction it wobbles, then attach the balancing clip to different blades until you find the one that reduces the wobble. Once you’ve identified the problematic blade, slide the clip along that blade until the wobble is minimized, then attach the adhesive weight at that position.
The whole process really comes down to working methodically and not rushing through the steps. Take your time with the wiring, double-check that everything’s secure at each stage, and don’t skip the voltage testing. A properly installed downrod will give you years of reliable service and optimal airflow, making those hot summer months a lot more bearable. And if you run into any issues specific to your fan model—like unusual mounting bracket designs or proprietary connection systems—the manufacturer’s installation manual is always your best friend. These manuals usually include torque specifications and model-specific quirks that can save you a serious headache, and most are available as PDFs online if you’ve misplaced the paper copy that came with your fan.